Manage Roles
MyRBQM Portal uses a role-based security model, so that each user's permissions match the tasks they actually need to perform. A Company Administrator (or other authorized user) can create roles by combining any of the available privileges. The list of privileges is created and maintained by Cyntegrity; however, roles are created by users. Roles and privileges in the MyRBQM Portal exist at the Company level only. A list of privileges, along with a detailed explanation of each privilege, is provided in the Privileges article.
Roles give a user access to different levels of system functionality, tailored to their business needs.
To create a new role:
- Navigate to Settings → Company Settings from the header menu → Roles tab.
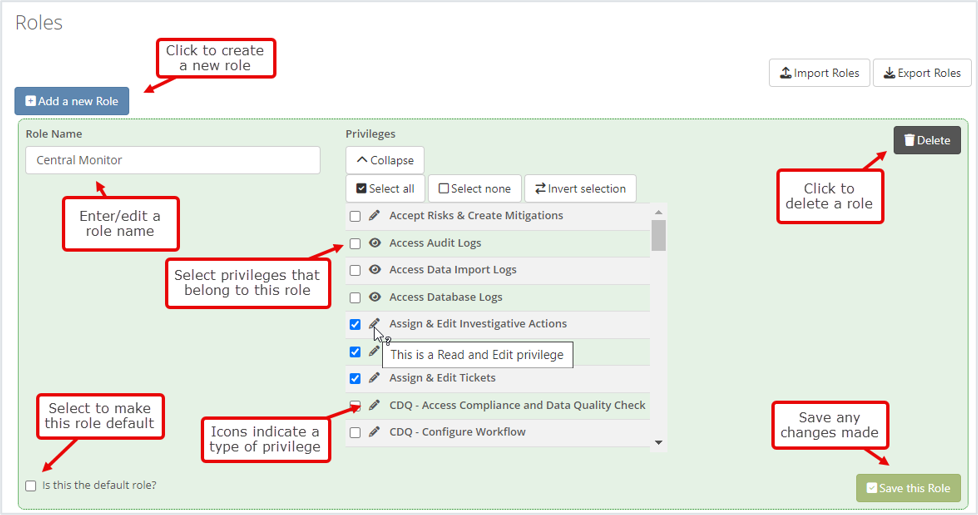
- Click Add a New Role.
- Enter a name for the new role, then select all privileges that belong to this role from the privileges list. Combine privileges to match how your team actually works — for example, a read-only auditor role, or a site-monitoring role limited to CRA-relevant privileges. Role can be edited any time.
- Select Is this the default role? for a default role. A Default Role is a role that is automatically assigned to all new users once they confirm their account in the MyRBQM Portal. Only one role can be selected as the Default Role at a time for each company.
For security reasons, roles that include the Company Administrator privilege must be assigned manually and will not be granted automatically even if set as default, preventing Company Administrator privileges from being granted to new users unintentionally.
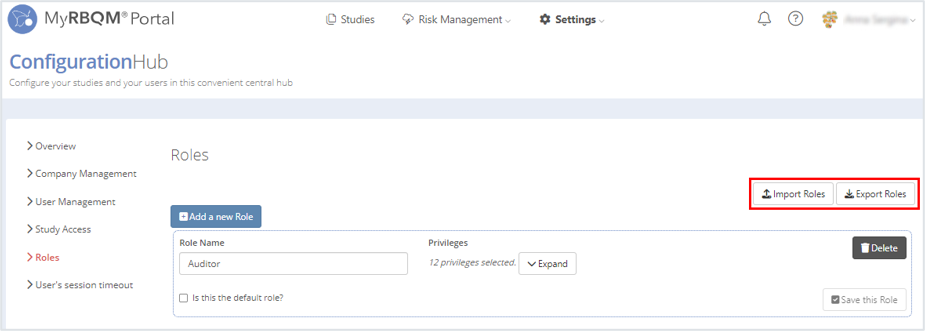
All company roles are listed on the Roles page. Click the drop-down arrow on each role card to expand a role and see or select its privileges. The number of privileges currently selected is shown alongside it.
To export the roles list click Export Roles to generate a .csv file with one row per existing role in the company:
1. Column 1 — the role's name.
2. Column 2 — True/False, depending on whether the role is the default.
3. Column 3 — a comma-separated list of the privileges assigned to that role, using the exact names from the Privileges list.
Click Import Roles to import an existing .csv file. If a role in the file shares a name with a role that already exists, rename the existing role first. Use exported file as a template to import the roles list.